|
by Jim Langley | |
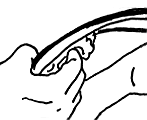
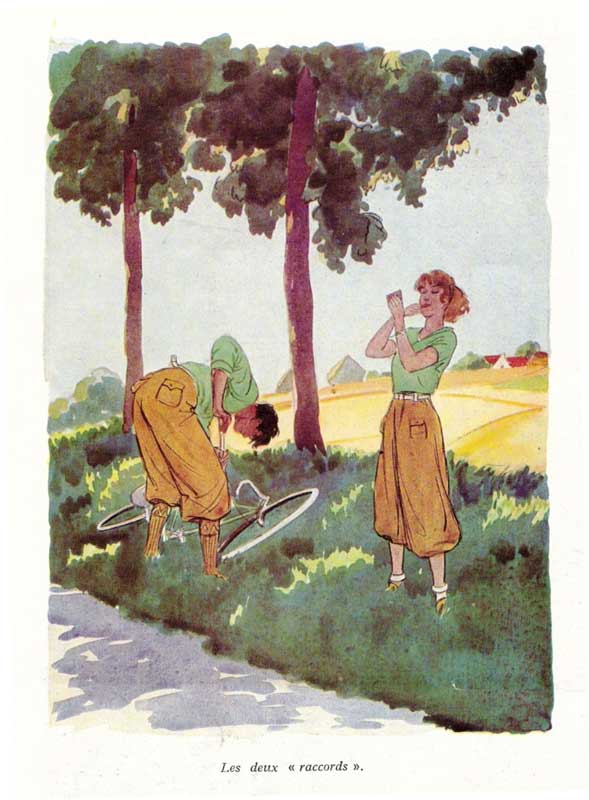  Click on the picture to open the full illustration and see how flat tires Click on the picture to open the full illustration and see how flat tirescan be fun. While he works, she enjoys the break from riding |
|
|
Here’s What’s Needed for Bicycle Flat Tire Repair
|
|
1. When you puncture,
stop riding as soon as it’s safe. If you’re riding with friends,
let them know you’ve flatted so they don’t run into you as you
slow down; and so they don’t just keep riding. If it’s a rear
flat, shift to the smallest cassette cog while slowing. Get off, move
off the road or to the side of the trail, then open your brake quick-release
(road bikes) or unhook the cable on V-brakes and cantilevers (mountain
bikes). |

 Click picture to enlarge Click picture to enlarge |
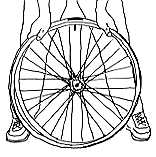
2. Open
the wheel quick-release (QR) and remove the wheel (or unscrew axle
nuts if that’s what’s on yours). For front flats, lift the bike
by the handlebar with one hand while removing the wheel with the other.
For rear flats, grip the seat with one hand and lift. Remove
the wheel with your free hand by pushing down (or forward for horizontal
frame dropouts). To keep your hands clean, try to shake the chain off
the cog as you remove the wheel. If it resists, lift it off with one finger
(it’s easy to clean just one finger). Then rest the bike on its left
side. |
 |
3. Release any air still in
the tire. If there’s a cap on the valve, remove it so you can release
all the air from the tube. With presta valves, unscrew the top and press
it with one finger. With Schraders, press the hook on your tire lever
or whatever you have into the valve. While doing this, go around the tire
with one hand squeezing to get all remaining air out. Also go around the
rim and squeeze and work the tire toward the center of the rim because
that’s the deepest portion of the rim (called the rim well). If you
can get the tire to sit in the rim well, it’ll create slack between
the tire and rim making it much easier to remove the tire (you’ll
use the same technique during installation). |
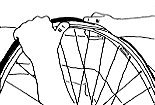
 Tire levers make it easy to remove Tire levers make it easy to removeeven the tightest-fitting tires |
4. To remove the tire, insert one tire lever under the tire’s edge (called the tire bead) opposite the valve stem. Wiggle it beneath the bead and pull down on the top of the lever to pry a small section of the bead over the rim. Hold the lever in place against the spokes (or attach its hooked end to one spoke if possible). Put another lever under the same tire bead about 4 inches from the first, and pry another section over the rim. Move 4 more inches, pry, and continue until the entire bead is removed. Then reach inside the tire, grasp the tube, and pull it out. To allow the valve stem to be removed, uncover it by pushing the tire away with the heel of your hand. To ease inspection of the tire and rim, remove the other bead (it should come off easily). Because you’re going to replace the popped tube with your spare, you can stuff the bad tube in your jersey pocket or seat bag to patch later. |
 Slide a rag or your glove Slide a rag or your glovearound inside the tire to find what popped the tube |
5. Before installing the new tube,
it’s crucial to check the tire and find and remove whatever it was
that gave you the flat. You can check with your hand, but if there’s
a piece of glass in there, you might cut yourself. So, a safer way to
check is to run your glove around the inside of the tire. If there’s
something sharp in there it’ll snag the glove. Be sure to go in both
directions, though, in case it’s a piece of wire or something lodged
at an angle. Also check the tire tread visually. Remove any sharp objects
in the tire or tread. If nothing snags the glove and you don’t find
anything, it’s likely that whatever popped the tube has already fallen
out of the tire. Also check the wheel to see if the rim strip (it covers
the rim holes and/or nipples so they can’t cut the tube) has shifted
allowing sharp edges to cut the tube. Make sure the strip covers every
hole/nipple. |
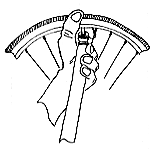
 Resting the wheel on the ground Resting the wheel on the groundand moving both hands away from the valve stem, work one bead onto the rim |
6. To reinstall
the tube and tire, inflate the spare tube just enough to remove the wrinkles,
then place it inside the tire starting with the valve stem. Lean the wheel
against your shins with the valve hole on top. Hold the tire and tube
combination (valve on top) with both hands, place a portion of the closest
bead on the rim and insert the valve stem a quarter of the way into the
rim hole. Work the bottom bead (the one closest to your body) onto the
rim by moving your hands apart, away from the valve stem. Keep moving
your hands and pushing down and when you reach the bottom lift the wheel
and pop the one bead onto the rim. Now that one bead’s in place,
tuck the tube fully inside the tire, which will make the second bead flush
with the rim. |
 Rest
the wheel on your knee and push Rest
the wheel on your knee and push down to roll the last difficult section onto the rim |
7. To finish tire installation, start
at the valve stem and work the second bead onto the rim. Push the valve
stem up into the tire so its thick base isn’t trapped beneath the
bead. Use the heels of your hands to work the bead onto the rim all the
way around. It's usually difficult to complete the last section, but remember,
it doesn’t take strength, just good technique. Try letting the air
out of the tube. Also, go around the tire and pinch the beads toward the
center of the rim, which will get them into the deeper rim section and
create some slack. Don't try to pop the entire last section on. Instead
try to pop on an inch at a time with your stronger hand and gradually
work the section on. (If you’re using a Speed Lever, the lever does
the work for you.) |
 To prevent damage to the valve, To prevent damage to the valve,brace it while inflating by wrapping your thumb over the tire and a finger around the pump head |
8. Push the valve into the tire one more time to make sure it’s not trapped beneath a bead and then inflate the tire partially. Before completely pumping it up, remove the pump and spin the wheel to see if the tire is seated correctly on the rim. All tires have lines on the sidewalls that should be equidistant from the rim all the way around. Sight for this as the wheel spins. If either line dips below the rim edge in one spot, add air to pop it up into place. If either rises above the rim, let the air out and check to ensure that the tube isn't trapped beneath the tire bead. Use your lever to gently (don’t pop the tube!) push the tube into the tire if it’s under a bead. Then finish inflating the tire. Reinstall the wheel making sure it’s aligned in the frame or fork, tighten the wheel quick-release, close the brake quick-release and you’re ready to ride. Good job! |

 to the WRENCH page |