BICYCLE REPAIR
|
|
| Equipment: Round up the following:
|
|
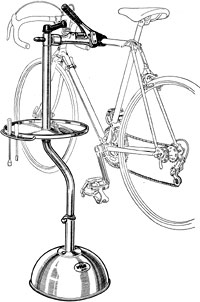
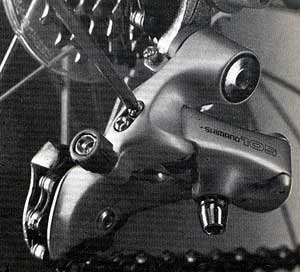
 Place the bike in a repair stand. While pedaling by hand, shift the
chain to the smallest freewheel cog and middle or smallest chainring (photo,
right).
Place the bike in a repair stand. While pedaling by hand, shift the
chain to the smallest freewheel cog and middle or smallest chainring (photo,
right). |
 |
 |
 Cut off the end cap, loosen the anchor bolt, and extract the cable. If it’s
kinked or rusted, replace it. Grease sections that run inside housing (photo)
and reroute the cable through the housing and to the anchor bolt. Turn the
derailleur adjustment barrel clockwise all the way, then unscrew it one
turn. Don’t tighten the anchor bolt yet.
Cut off the end cap, loosen the anchor bolt, and extract the cable. If it’s
kinked or rusted, replace it. Grease sections that run inside housing (photo)
and reroute the cable through the housing and to the anchor bolt. Turn the
derailleur adjustment barrel clockwise all the way, then unscrew it one
turn. Don’t tighten the anchor bolt yet. |
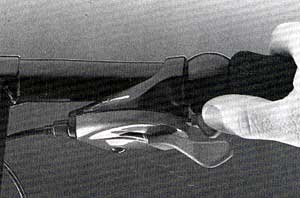
 While pedaling with your right hand, push against the derailleur body with
your left thumb (photo), causing a shift to the largest cog. Release
the pressure with your thumb to shift to the smallest cog. Do this repeatedly,
noting any hesitation or overshifting. The chain should move smoothly onto
the smallest and largest cogs.
While pedaling with your right hand, push against the derailleur body with
your left thumb (photo), causing a shift to the largest cog. Release
the pressure with your thumb to shift to the smallest cog. Do this repeatedly,
noting any hesitation or overshifting. The chain should move smoothly onto
the smallest and largest cogs. |
 |
 |
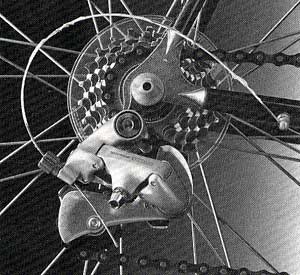
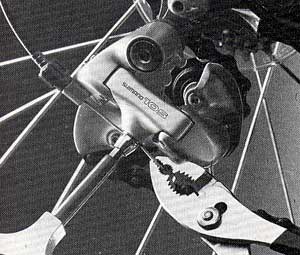
 If
necessary, adjust the derailleur’s range of motion by turning (photo)
the high- and low-gear limit screws (usually the top and bottom, respectively)
to allow the derailleur to shift accurately to the largest and smallest
cogs. Counterclockwise turns allow it to move farther; clockwise turns
limit it. Keep shifting with your thumb and fine-tuning the screws until
the chain shifts perfectly onto each cog with no hesitation or overshifting
(off the top or bottom cogs). If
necessary, adjust the derailleur’s range of motion by turning (photo)
the high- and low-gear limit screws (usually the top and bottom, respectively)
to allow the derailleur to shift accurately to the largest and smallest
cogs. Counterclockwise turns allow it to move farther; clockwise turns
limit it. Keep shifting with your thumb and fine-tuning the screws until
the chain shifts perfectly onto each cog with no hesitation or overshifting
(off the top or bottom cogs). |
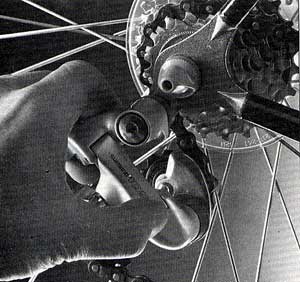
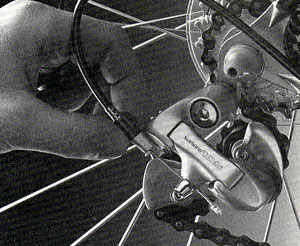
 With the chain on the smallest cog, grasp the cable with pliers and pull
lightly to remove slack. While holding the cable, tighten the anchor bolt
(photo). Install the cable end cap and crimp it in place with diagonal
cutters. While pedaling with your left hand, shift repeatedly with your
right to test adjustments. The chain should engage the largest and smallest
cogs accurately. If necessary, adjust the limit screws.
With the chain on the smallest cog, grasp the cable with pliers and pull
lightly to remove slack. While holding the cable, tighten the anchor bolt
(photo). Install the cable end cap and crimp it in place with diagonal
cutters. While pedaling with your left hand, shift repeatedly with your
right to test adjustments. The chain should engage the largest and smallest
cogs accurately. If necessary, adjust the limit screws.If the chain won’t drop to the smallest cog despite adjusting the limit screw, you may need to loosen the cable by turning the adjustment barrel clockwise half a turn. The other possibility is that you'll need to remove slack that’s developed (new cables usually stretch a bit) by loosening the anchor bolt, and pulling on the cable with pliers to remove the slack. The adjustment is right when the cable has no noticeable slack but is not too tight, either. |
 |
 |
 For the final adjustment, while pedaling with your left hand, move the lever
one click with your right. The chain should jump to the second-smallest
cog and run quietly. If it hesitates, screw the adjustment barrel
counterclockwise one-half turn (photo) and retry. Repeat this until
it shifts immediately onto the cog. If it overshifts, screw the barrel
clockwise by half turns until it doesn’t. Shift through all the gears
and test ride the bike. Fine-tune again if necessary.
For the final adjustment, while pedaling with your left hand, move the lever
one click with your right. The chain should jump to the second-smallest
cog and run quietly. If it hesitates, screw the adjustment barrel
counterclockwise one-half turn (photo) and retry. Repeat this until
it shifts immediately onto the cog. If it overshifts, screw the barrel
clockwise by half turns until it doesn’t. Shift through all the gears
and test ride the bike. Fine-tune again if necessary.Note: Once the derailleur is adjusted properly, about the only adjustment necessary (assuming you don’t crash and damage the derailleur) is taking care of any cable slack that develops from stretching, which occurs over time. To remove slack and restore perfect shifting, simply turn the adjustment barrel counterclockwise in half turns. |
|
This article
is based on one I wrote for the March 1991 issue of Bicycling Magazine.
The photos are by Mel Lindstrom. I set up the shots and appear in them. |
|
 to the WRENCH page
|
|