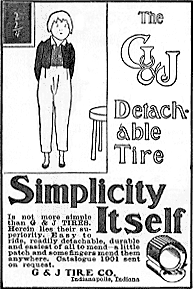
 ad from Harper’s Magazine more old ads |
Go to my step-by-step fix a flat article. Two secrets that can make it much easier to get a tire on and off the rim are to use a thin rim strip inside the rim (I’m not talking about its width but about its thickness: a good one is the ROX rim strip), and to use a tube that’s one size smaller in width than the tire you’re using. For example, if you use a 700 x 25C tire, use a 700 x 20C tube. BACK When you get a rear flat on your pavement pounder, instead of laying the bike on the ground after you’ve removed the wheel, try standing it on its front wheel. Just set the bike so the front wheel is on the ground and rotate the rest of the bike upward. When it’s almost vertical, the frame will touch the brake supporting the bike. This won’t work on all bikes and you may have to move the bike a bit to find the balance point. But it looks cool when it works and it keeps the bike nice and tidy. BACK Boots are tire patches (not to be confused with tube patches). Boots are used when you ride over some glass or swipe a sharp rock and put a gash in your tire. If you just put in a new tube, when you pump it up, it’ll expand through the hole and KERPLOW! explode. Bummer. But, if you’re packing a few 1- x 2-inch boots (made of any tough material such as denim or nylon or sail cloth), during tire installation you can slip one between the tube and tire and you’ll be rolling again (though the tire will have a bulge, the tube should stay inside long enough to get you home). BACK Presta valves are relatively delicate and they can break right off if you’re not careful when pumping up a tire with a frame-mount pump. To prevent this, reinforce the valve while pumping by holding the end of the pump with part of your hand and at the same time wrapping a finger around a spoke and resting your thumb on top of the tire. (If your hands are small, you may have to do one or the other.) Just do your best to support the valve so that when you’re inflating the tire, the valve is not taking the brunt of your pumping force. BACK When you’re patching a tube, the easiest way to mark the hole so that you don’t lose track of it when you put the glue on (the glue usually obscures ink marks), is to simply tear the hole to about 1/4 inch. That way, you’ll be able to find the hole no matter what! (And any good patch won’t have any trouble repairing the hole). BACK When you have a flat on your bike, before removing the wheel, always check for a slow leak at the valve. Just put a little spit on your finger and wipe it on the end of the valve (remove the plastic cap) and see if air hisses out. Presta valves (also know as French or needle valves and skinnier than Schrader valves), sometimes are made of two parts. Look for wrench flats near the end of the valve and turn the end of the valve with a wrench clockwise to stop the slow leak. Or, remove the faulty end, put a drop of oil on the rubber gasket and reinstall the end of the valve. Still leak? Replace the valve core (that piece you tightened). For Schrader valves (they’re exactly like car valves), use the spit trick to find a leak. Sometimes the leak is real slow so wait to see if a bubble forms. If it does, you’ll need to tighten the valve core. To do this you need either a valve tool or a special valve cap with a pronged end designed for tightening the valve core. Turn it clockwise to tighten it and seal the leak. If tightening it doesn’t stop the leak, remove the core, put a drop of oil on the rubber gasket and reinstall the core. Still leak? Replace the core with a new one. BACK If you’re at home, inflate the tube and put a little bit at a time into the water tank on the back of your toilet (not the bowl!) until you spot the air hissing out of the hole in the tube. (The water in the tank is clean and it saves you the time of filling the sink.) On the road or trail, listen carefully to hear the hissing of the escaping air. Another technique that works is to slowly turn the tube passing it by your ear and face. Listen for the hiss but also at the same time, see if you feel the air blowing on your face, which is very sensitive and often will find the leak before you can hear it. BACK Don’t worry about a patched tube being any less reliable than a new one. As long as you use a quality patch (I don’t recommend glueless patches) and apply it properly, the patched section will actually be stronger than the rest of the tube (because there’s now an extra layer). In fact, you can patch a tube a dozen times or more and keep right on using it. BACK |