  |
|
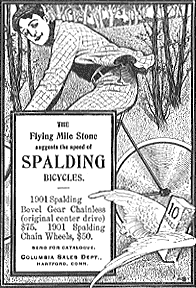
 1901 ad for Spalding bicycles from Harper’s Magazine. Note that the $75 bike is a Bevel Gear Chainless model! more old ads |
Go to my step-by-step Wheelbuilding
the Easy Way article. Go to my step-by-step, extensive full Wheelbuilding article. One of the simplest ways to make wheelbuilding go more smoothly is to lubricate the nipples before you start building. Get lube on the outside and inside of the nipples and you’ll prevent binding and truing problems later. Or splurge and buy some spoke preparation to coat the threads with such as what’s offered from Wheelsmith. BACK Don’t let anybody tell you that there’s something wrong with aluminum spoke nipples. They’re a great way to save weight where it counts (remember that rotating weight is most noticeable when you’re riding). You’ll have zero problems building with alloy nipples if you use the correct spoke length, lubricate the nipples inside and out and use the correct size spoke wrench. The one exception is on wheels used in the winter in locations where they salt the roads. Standard nickel-plated brass nipples hold up better in these conditions than aluminum ones. BACK Most home-built wheel problems are caused by uneven spoke tensioning, and the culprit is usually adding tension too early in the build process. After you’ve laced up the wheel, true it by loosening spokes. Try not to tighten any spokes. Or tighten to move the rim, then loosen. Your goal is to get the rim perfectly round and perfectly true side to side with almost zero tension in the spokes (of course, you should have already seated the spoke bends against the hubs and the nipples inside the rim, which you can do by tapping on the spoke bends at the hub with a mallet and squeezing parallel spokes with your hands). Once the wheel is true and round with zero tension, you can systematically go around and add layers of tension until the spokes are tight and adequately tensioned. BACK An easy way to quickly true a wheel with a little wobble is to find the loose spoke by going around and wiggling all the spokes to feel for differences in tension. When you find the loose spoke, pluck it and compare its tone to the one next to it on the same side of the wheel. Now, tighten the nipple on the loose spoke until its tone when plucked is the same. Usually, when the tones match, the wheel is true. This bicycle repair trick will save you lots of time. BACK An emergency spoke is one that can be inserted in a wheel without removing the wheel from the bike or removing the cassette cogs, tire and tube. To make one, get a spoke that’s the same type as what’s in your wheel (so that it’ll screw into the nipples in your wheel). A shop can help you with this. But get that spoke about 5 mm longer than what you have now. To turn it into an emergency spoke, cut the head off the bottom of the spoke (non-threaded end) and put two 90-degree bends into the spoke so the end looks like an upside-down L. With this bend in the end of the spoke, if you break a spoke on the road and you have your emergency spoke, you’ll be able to extract the broken spoke and easily replace it with the emergency spoke. Because the emergency spoke has no head, you just poke the bend into the hub hole, weave the spoke through the others, screw it into the nipple and tension the spoke. No wheel disassembly required! This trick also allows you to repurpose long spokes and cut them down to use in smaller wheels for bicycle repairs (so you don’t have to search for the right length spokes). BACK When you’re building a wheel and working with nipples, it can be difficult to get them where you want them in the rim. This is especially true when working with triangular-section aero rims, where the nipples can drop inside the rim, forcing you to shake them out. To avoid this hassle, use a spoke to hold the nipple while you place it in the rim (a dab of grease on the nipple will keep it in place). To do this, simply thread the upside-down nipple one or two turns onto the end of the spoke and use the spoke as a handle to put the nipple where you want it. Bend a shape on the other end of the spoke if you want to make it into a tool for your kit. BACK |
|